
Adding ControlByWeb Ethernet devices to your cloud account is simple. The following steps will walk you through the process.
To do this successfully, you need a cloud compatible ControlByWeb device such as a 400 Series controller or a Wi-Fi module. You’ll also need to have purchased a device seat. To see if your device is compatible or to order device seats, visit controlbyweb.com/cloud..
The following steps will help you easily add Cellular devices to the Cloud:
1. Start by visiting controlbyweb.cloud and sign into your account. If you don’t have one, create a free account now by following the prompts.
2. You’ll be directed to the Account Summary page. You can verify that you have an available device seat by looking at the Total Device Seats section of the Cloud Summary page. If there is no available device, purchase a new device seat at www.controlbyweb.com/cloud.
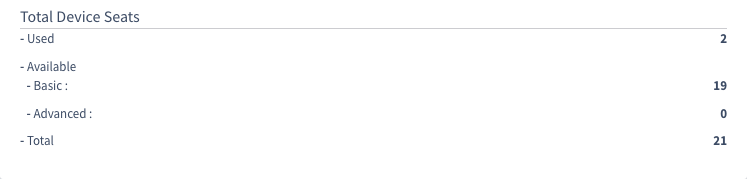
Then, you’ll need to register a device seat by clicking on the Register Device Seat button in the top right corner of the page. You’ll need the device seat code from the bottom of your order confirmation email.
3. Navigate to the Devices page in the left-hand navigation menu. Click the green New Device button on the right.
4. Here you’ll find a table that will display Certificate Request Tokens. These tokens are pasted into your device settings to automatically connect it to your cloud account. Click the green Generate Token button on the right.
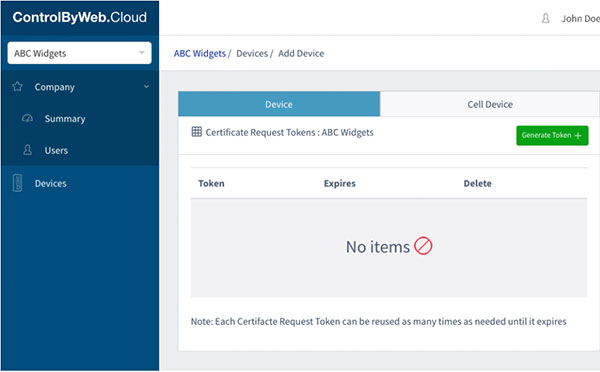
5. Highlight and copy the new token.
6. In a separate browser tab or window, go to your device settings by entering the IP address followed by /setup.html. Log in to your device.
7. For 400 Series devices, you’ll go to the Advanced Network page under the General Settings section. For Wi-Fi devices, visit the Wi-Fi Networks page.
8. Next, enable Remote Services by clicking Yes under the Remote Services section and ensure the Version drop-down selection is 2.0. On Wi-Fi devices, you’ll paste the Certificate Request Token into the field provided. On 400 Series devices, you’ll change the Certificate Request Method to Certificate Request Token and then paste the token into the field provided.
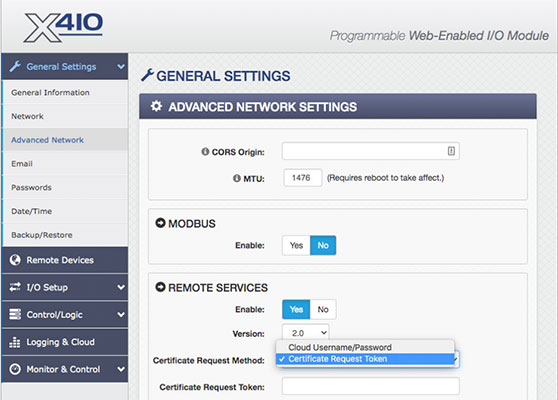
400 Series devices also allow you to enter the username and password of your cloud account by leaving the Certificate Request Method selector on Cloud Username/Password. However, we’ve found that our customers often mistype their login credentials, making the token method the preferred way.
9. Save your changes by clicking Submit at the bottom of the page. Your device will now automatically connect to your cloud account.
10. Navigate back to your cloud account and select Devices from the left-hand navigation panel.
11. Your device will appear on the Devices page as long as your Internet connection is stable.
12. You can now access the device’s Control and Setup pages.
If you follow these directions and still have questions, contact us.